在Padavan上实现校园网的自动登录
首先,我们知道 EndangeredF1sh 大佬改进的 UPCNet 是不兼容 Padavan 的,因为hiboy的Padavan在存储位置上与OpenWRT有很大的不同,笔者在执行autoinstall.sh的时候就出现了
1 | ./autoinstall.sh: line 3: readlink: not found |
这样的一连串错误,那么这是不是代表着 Padavan 并不能使用 UPCNet 脚本呢?答案是可以的,但是需要比较麻烦的步骤。
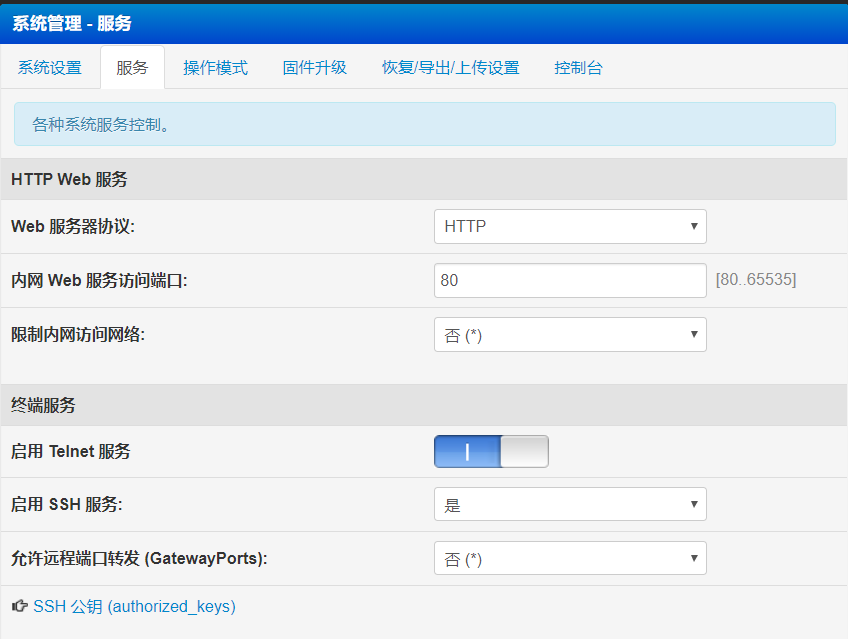
确认自己打开了路由器的SSH功能
在[高级设置]-[系统管理]-[服务]-[终端服务]-[启用 SSH 服务] 将 SSH 功能打开。如图所示:
使用 putty 或者 XShell 这样的 SSH 服务端连接上路由器,并且执行下列命令,切换到
/etc/storage目录底下:
1 | cd /etc/storage |
- 通过下列命令或者 WinSCP 和 Putty SCP 等工具将 UPCNet.sh 上传到
/etc/storage目录底下:
1 | wget --no-check-certificate https://raw.githubusercontent.com/EndangeredF1sh/UPCNet/bash/UPCNet.sh && chmod +x UPCNet.sh && sh UPCNet.sh |
- 执行
UPCNet.sh:
1 | ./UPCNet.sh |
关于账号密码的填写请参考 EndangeredF1sh 大佬的项目主页。
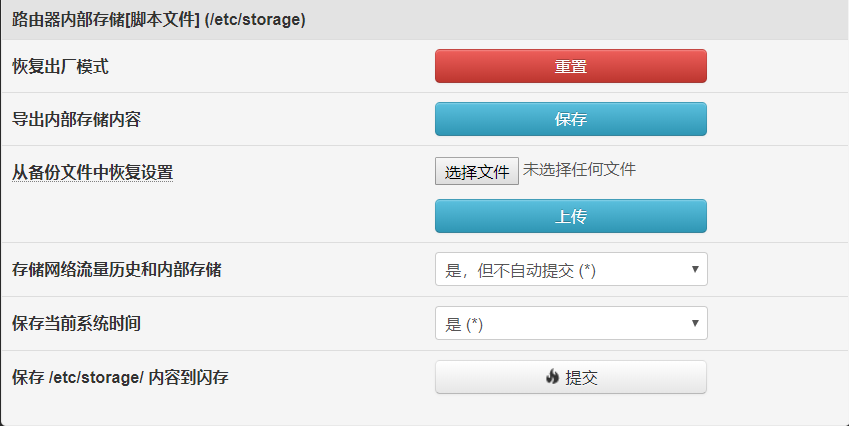
- 在 Padavan 的设置下保存
/etc/storage: 高级设置 - 系统管理 - 恢复/导出/上传设置 - 点击 保存 /etc/storage/ 内容到闪存 右侧的“提交”按钮。如图所示:
如果觉得不放心,请在 SSH 环境下执行:
1 | mtd_storage.sh save |
Save storage files to MTD partition “/dev/mtdblock5”
Unlocking ‘Storage’ …
Writing from ‘/tmp/storage.tar.bz2’ to MTD ‘Storage’ … [ok]
Done.
- 在 高级设置 - 自定义设置 - 脚本 - 路由器启动后 里添加计划任务,以使脚本随着路由器开机而启动:
1 | bash /etc/storage/UPCNet.sh |
- 在 高级设置 - 系统管理 - 服务 - 其他服务 - Cron守护程序 (计划任务) 里添加计划任务,以使路由器能根据 crontab 运行脚本。
定时规则可在 crontab guru 中生成。
1 | * * * * * bash /etc/storage/UPCNet.sh |
如图所示: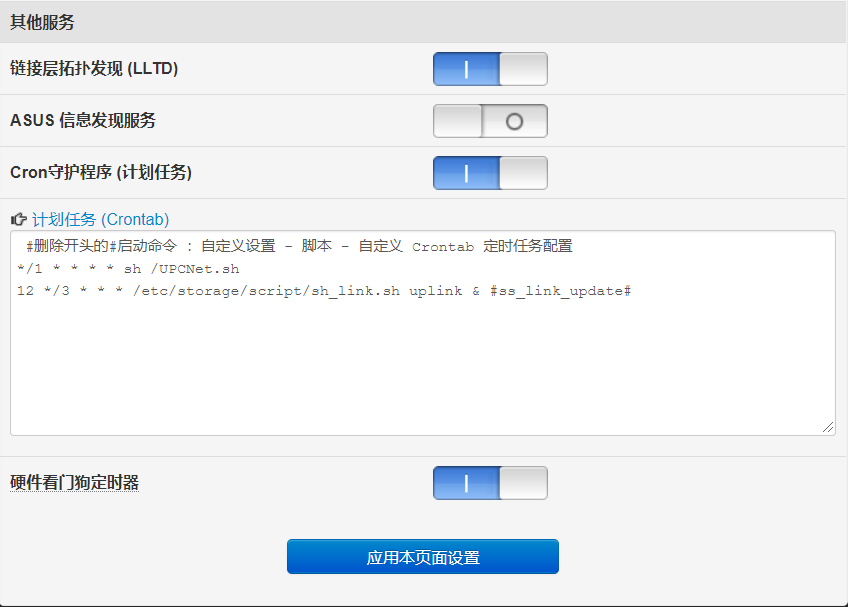
- 这样路由器应该就可以自动登录并且验证校园网了。
作者测试环境:
newifi 3 D2 (MT7261A)
Padavan hiboy版 3.4.3.9-099_8-11-4